Add Parts List
“Add Parts List” is great tool for WEBLINK Users/Customers and their Salespeople to set up inventories to be ordered and confirmed when using the Parts Catalog or when ordering inventory stocking items.
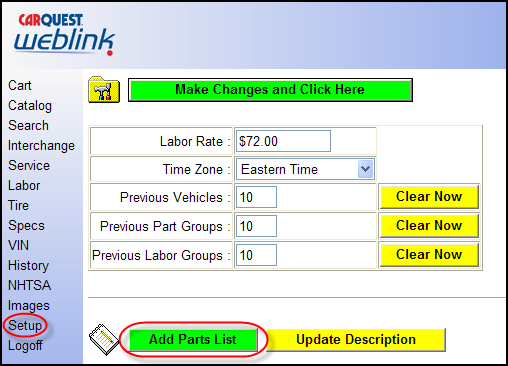
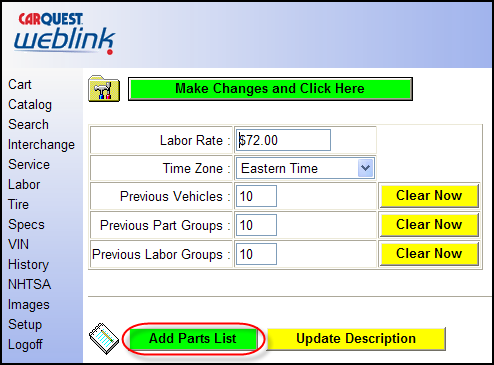
To create a parts list that you can access from the active or open cart area, click the button labeled “Add Parts List” available on the “Setup” screen.
The WEBLINK User or the CARQUEST Sales Pro can set up a Parts List two ways:
The First Method, for example, is by manually creating a short list of popular items that could be reordered when needed. THIS SHORT LIST will contain quantities, line codes, part numbers, and descriptions to help the User reference part numbers and allow easy reorders on FAST MOVING and Popular ITEMS the Service Dealer could stock or need replaced on a regular basis. After clicking on the “Add Parts List” in the First Example we will create a list of “FAST MOVING CHEMICALS”.
In this example, the User enters “FAST MOVING CHEMICALS” in the Parts List Description Box and clicks on the green Add button.

On the left side of the Page are columns where the WEBLINK User can enter the Quantity, Line Code, Part Number, and Part Descriptions. After the fields are populated the User clicks on the Green “Add Parts to Parts List” button.
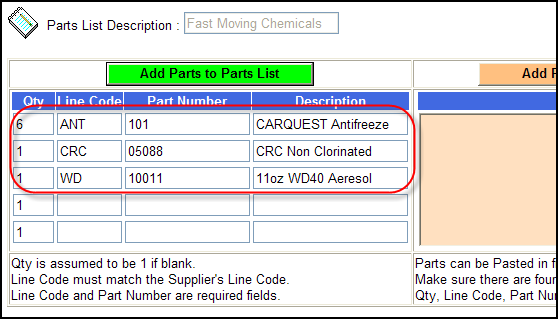
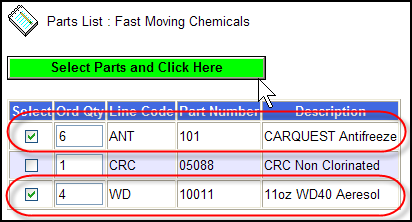
The FAST MOVING Chemicals are displayed at the bottom of the screen and can be updated for quantities, Part Numbers, and or descriptions. In addition, the WEBLINK User can Delete one Part Item or delete the entire Part List.

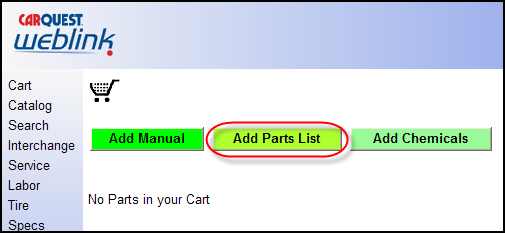
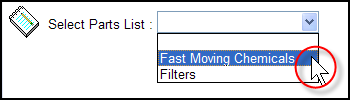
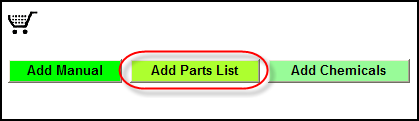
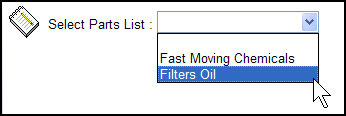
The WEBLINK User can then go to the CART click on green “Add Parts List” button and display the FAST MOVING CHEMCIAL parts list in the drop down box. Then click on, change quantities, and or order the Part Items from the Parts List.
 h
h
The Second Method, and more robust way, to set up a Parts Lists are to first create the Parts List in a Microsoft Excel, CSV, or TXT File format. This is very useful for large part number Inventory Parts Lists. Be sure the Part List is formatted with four (4) columns consisting of Quantity, Line Code, Part Number, and Part Description.
NOTE: It is very important to create very good part descriptions to help the WEBLINK User understand the quality, size, weight, and or brand of the Part Item.
In this sample, we will set up an inventory part list for Oil Filters. Start by clicking on the Green “Add Parts List” in the Setup section.
In this example, the User enters “FILTERS OIL” in the Parts List Description Box and clicks on the Green “Add” button.

On the right side is the area where the WEBLINK User can copy the Quantity, Line Code, Part Number, and Part Descriptions from an Excel Spreadsheet and Paste the Part information into the Tan Area of the screen.
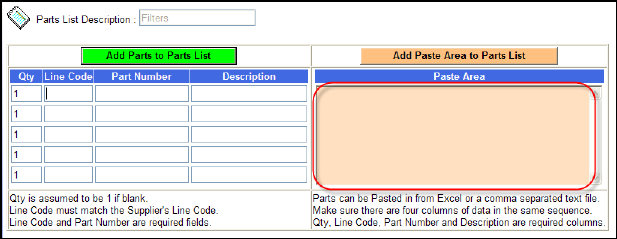
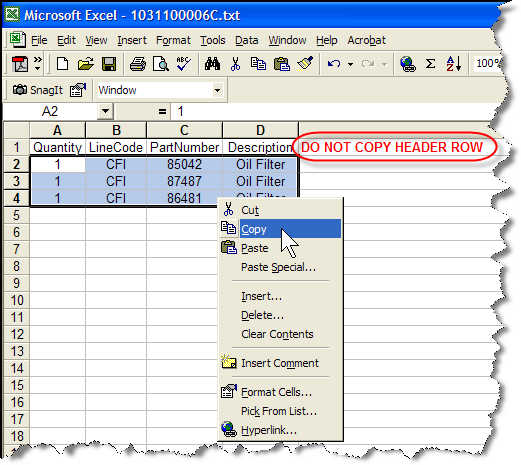
Below is a sample screen shot of an Excel Spread sheet for Oil Filters that we are going copy and paste in to the Tan Parts List Area.
NOTE: Be sure to only Copy and Paste the areas from the Excel Spreadsheet that pertain to Part Information (Quantity, Line Code, Part Number, Part Description) and NOT the Column headings descriptions that may have been used when setting up the Excel spreadsheet. USE or MAKE GOOD Part descriptions (Brand Name, Size, Shape, Type, etc); the better the descriptions the better your customer can find Parts Item in the list to purchase from CARQUEST.
After the Tan paste area is populated the User clicks on the TAN “Add Paste Area to Parts List” button.
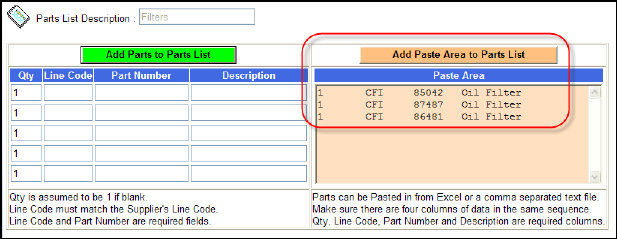
The Oil Filters are displayed at the bottom of the screen and can be updated for quantities, Part Numbers, and or descriptions. In addition, the WEBLINK User can Delete one Part Item or delete the entire Part List.

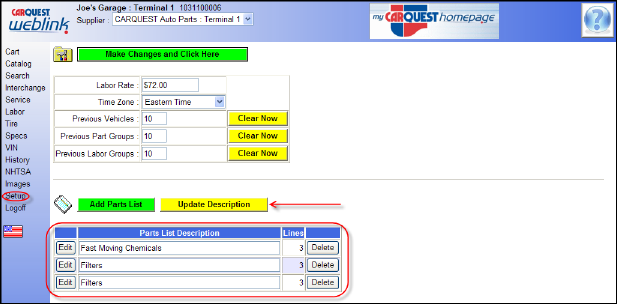
The image below shows the saved parts lists created in the setup area. Note the ability to change the parts list name by highlighting the old name, in this case “FILTERS OIL” or “FAST MOVING CHEMICALS” at which point simply type the new name and click “Update Description.” On the right end is a button labeled “Delete” – it will delete the entire list and CANNOT BE UN-DONE.
Don’t worry about it being perfect as you may add to the list or edit anytime by opening a saved list using the edit button next to the list you wish to update. When you click the edit button it will return to the previous location where you may add, remove or update any items then click the Update Parts List to save the changes.
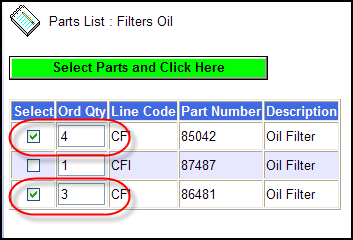
The WEBLINK User can then go to the CART click on green “Add Parts List” button and display the FILTERS OIL parts list in the drop down box. The User could then click-on, change quantities, and or orders the Part Items from the Parts List.
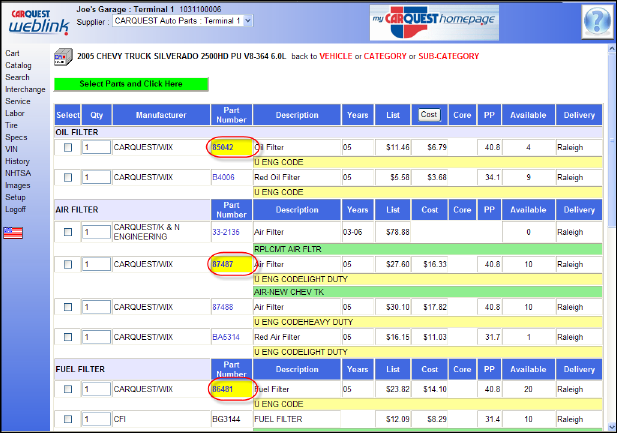
REMINDER: When looking up parts in the CATALOG, any PART items that are in the WEBLINK Part Lists will be highlighted in yellow to remind the WEBLINK User that these items are in the WEBLINK Parts List and may be in the Users Inventory.